How to create a Harvest Moon game with HTML - Part 1
In this series of blog posts I plan to flesh out a harvest moon game from scratch - using just simple HTML, CSS and some JavaScript. Will not be using any frameworks :)
Feb 7, 2022 | Read time 13 minutes🔔 Table of contents
In this article I will go over how you can create a harvest moon game with just pure HTML, CSS and simple JavaScript.
One of my favourite games on the SNES is Harvest Moon and I have never got into any of the new variations such as
stardew valley.
With modern CSS/HTML, I realised you can create this type of SNES game. You just need basic understanding of HTML and no use of crazy JavaScript game libraries and the use of canvas. This will be a series of posts, so follow along as I figure things out :)
You can check out the demo here
Code is here: https://github.com/kentaroau/harvestmoon-html
Basic idea of how it works
The basic idea of how to get this to work is by the following diagram:
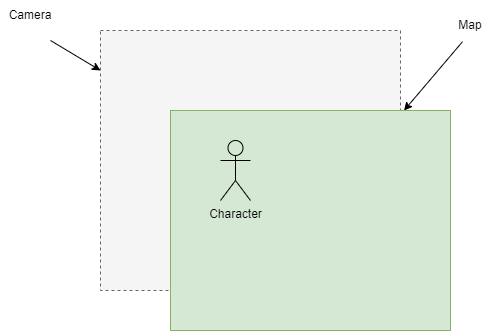
From the above we can see that we have the camera, character and map elements.
To give the appearance that the character is moving across the screen, we have to adjust the map with the CSS translate function.
transform: translate(16px, 200px);Addittionally, if you look closely to the above GIF, the camera and character is fixed. The character is always in the middle of the screen.
The only thing that is moving is the map background image!
HTML setup
Our HTML structure is quite simple and as follows:
<div class="main">
    <div class="corner_topleft"></div>
    <div class="corner_topright"></div>
    <div class="corner_bottomleft"></div>
    <div class="corner_bottomright"></div>


    <div class="camera">
       <div class="map">
          <div class="character" facing="down" walking="true">
             <div class="character_spritesheet"></div>
          </div>
       </div>

    </div>
 </div>
The important bits are the camera, map, and the character div above. The main div is just for styling/ centering and showing the pixelated corners (eg using corner_topleft, corner_topright, etc) to give us a gameboy type of effect.
The map DIV CSS
The map CSS is fairly simple. We just have a div with a background image. To get the pixelated effect, I used the
image-rendering:pixelated CSS property.
 .map {
    image-rendering: pixelated;
    background-image: url("map.png");
    background-size: 100%;
    width: calc(12 * var(--grid-cell));
    height: calc(12 * var(--grid-cell));
    position: relative;
 }
The background map image looks like below.
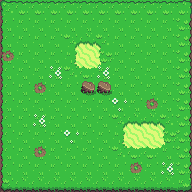
From the above CSS, you will notice we have the map.png and the image-rendering:pixelated property. Image-rendering is a property that you can define on
scaling background images. We set it to pixelated since this works quite well with our harvest moon pixel assets. Since pixel art
work on pixels and do not need smoothing, this property works when scaling up our pixel art backgrounds.
The character DIV CSS
We then will need to style the character element. We will have a character element and character__spritesheet element. The spritesheet
will be a large div that holds all of the animation frames for the character. The character element will be small and only show a
specific frame of the spritesheet.
.character {
width: calc(17px * 4);
height: calc(25px * 4);
position: absolute;
overflow:hidden;
}
.character_spritesheet {
position: absolute;
background: url("jack.png") no-repeat no-repeat;
background-size: 100%;
width: calc(51px * 4);
height: calc(100px * 4);
image-rendering: pixelated;
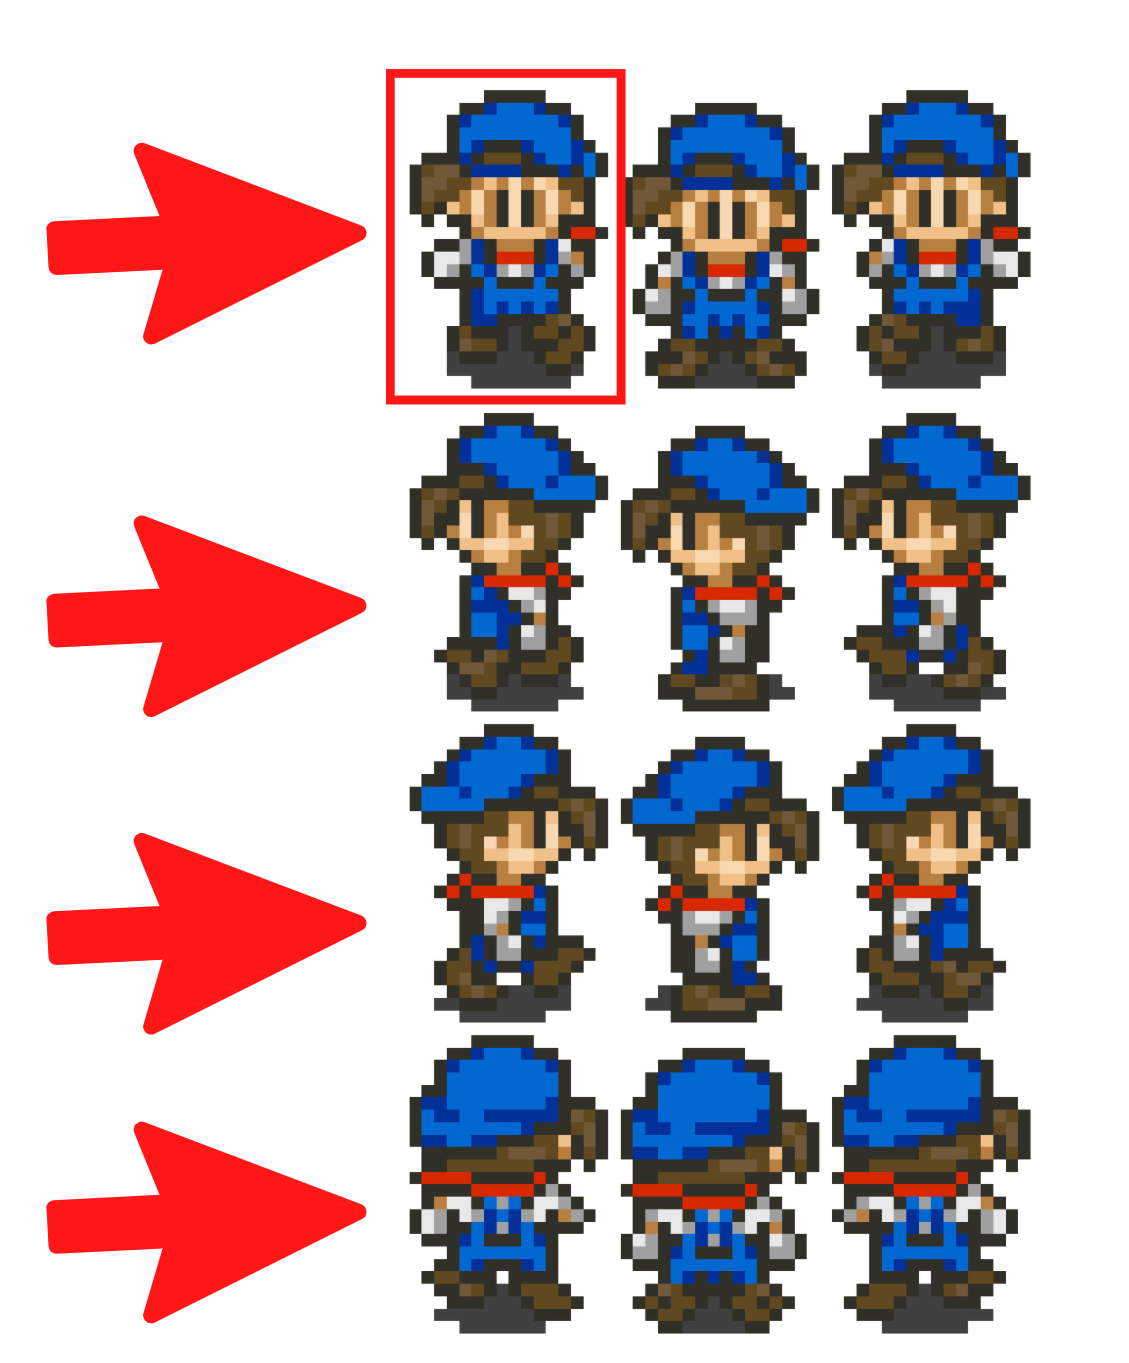
}Our character spritesheet looks like the below:
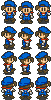
As the user presses a arrow key (eg left, right, etc) we will adjust the spritesheet by a frame.
Similar to the map background image, we will make it image-rendering: pixelated. This will allow us to scale it cleanly and with out blur.
Move the map the arrow keys are pressed
For example, when the user hits the right arrow, the map will translate the map a bunch of pixels to the left.
Alternatively, when the user hits the left arrow, the map will translate the map a bunch of pixels to the right.
We need to make the map go the opposite direction as the arrow key presss.
How to animate the character
From the above sections, we can see how to move the character around by adjusting the x,y position of the map - but how do we
animate the character?
To do this, we using the following keyframe animation with the steps function. So when the user presses a arrow key to walk, in our javascript, we add the walking attribute.
 .character[walking="true"] .character_spritesheet {
    animation: walkAnimation 0.6s steps(3) infinite;
 }

 @keyframes walkAnimation {
   from {
     transform: translate3d(0%,0%,0);
   }
   to {
     transform: translate3d(-100%,0%,0);
   }
 }
The key to animating our character is using the steps function. This just means that we adjust our character div by 100% of its
width every 0.6s. This works out nicely to give us the the effect of a frame by frame animation of the character.
Sidenote: Why are you using translate3d?
Translate3d moves an element in 3d space. When animating, it is preferable for performance to use this function over the translate function.
Translate3d computations will be offloaded to the GPU and not take up resources in the main loop - reducing possible janky animations.
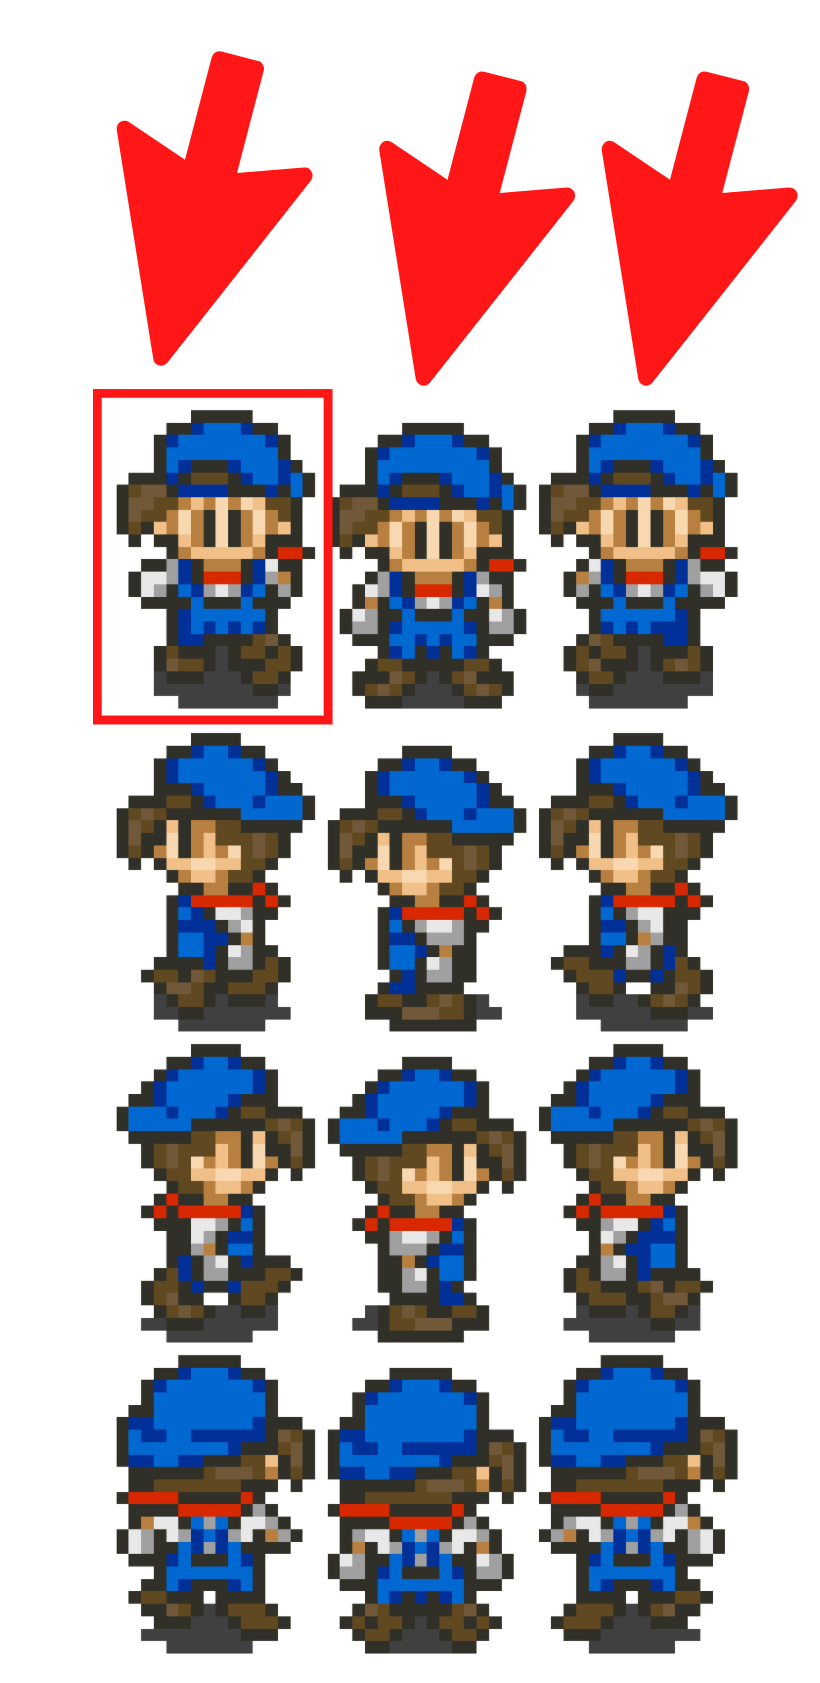
As you can see in the below diagram of how the animation will work - we move the character frame with each animation step:
Animating the character based on direction
We will also need to add the following CSS:
 .character[facing="right"] .character_spritesheet {
    background-position-y: calc( var(--pixel-scale) * -50 );
 }
 .character[facing="up"] .character_spritesheet {
    background-position-y: calc( var(--pixel-scale) * -75 );
 }
 .character[facing="left"] .character_spritesheet {
    background-position-y: calc( var(--pixel-scale) * -25 );
 }
So depending on the arrow key that is pressed, we want to adjust the y position of the spritesheet. JavaScript
will be used to add the attribute right, left, up to the character. Down will be the default character
facing direction. The negative numbers are the y positions of where each frame starts.
For example, if the right arrow key is pressed, we want to use the second row of our spritesheet to animate
walking in the right direction.
The JavaScript
So now we have setup everything we need for our Harvest Moon game. The final bit is using JavaScript to add the game interactions.
We will need JavaScript to help us with the following:
- Move the character when the user presses right, left, down, up arrow keys
- Check if the character has hit the wall and therefore stop the character from moving
(function () {

   function setCharacterDirection(held_directions) {

      const held_direction = held_directions[0];
      if (held_direction) {
         if (held_direction === directions.right) { x += 1; }
         if (held_direction === directions.left) { x -= 1; }
         if (held_direction === directions.down) { y += 1; }
         if (held_direction === directions.up) { y -= 1; }
         character.setAttribute("facing", held_direction);
      }
   }

   let character = document.querySelector(".character");
   let map = document.querySelector(".map");

   let x = 0;
   let y = 0;
   let held_directions = [];

   const moveCharacter = () => {

      let pixelScale = parseInt(
         getComputedStyle(document.documentElement).getPropertyValue('--pixel-scale')
      );

      setCharacterDirection(held_directions);
      character.setAttribute("walking", held_directions[0] ? "true" : "false");

      let leftWall = 0;
      let rightWall = 16 * 12;
      if (x < leftWall) { x = leftWall; }
      if (x > rightWall) { x = rightWall; }

      let topWall = -16;
      let bottomWall = (16 * 11);
      if (y < topWall) { y = topWall; }
      if (y > bottomWall) { y = bottomWall; }

      let camera_left = pixelScale * 100;
      let camera_top = pixelScale * 60;

      map.style.transform = `translate3d( ${-x * pixelScale + camera_left}px, ${-y * pixelScale + camera_top}px, 0 )`;
      character.style.transform = `translate3d( ${x * pixelScale}px, ${y * pixelScale}px, 0 )`;
   }


   const loop = () => {
      moveCharacter();
      window.requestAnimationFrame(() => {
         loop();
      })
   }

   loop();


   /* Direction key state */
   const directions = {
      up: "up",
      down: "down",
      left: "left",
      right: "right",
   }
   const keys = {
      38: directions.up,
      37: directions.left,
      39: directions.right,
      40: directions.down,
   }
   document.addEventListener("keydown", (e) => {
      let dir = keys[e.keyCode];
      if (dir && held_directions.indexOf(dir) === -1) {
         held_directions.unshift(dir)
      }
   })

   document.addEventListener("keyup", (e) => {
      let dir = keys[e.keyCode];
      let index = held_directions.indexOf(dir);
      if (index > -1) {
         held_directions.splice(index, 1)
      }
   });

})();
I will try my best to explain each section of the Javascript. The two important sections to look at is the moveCharacter and loop functions.
Game loop() function
As part of every game, there needs to be a game loop. This is just a forever running loop that updates the game state and
renders that state. In our case, everytime the user enters the left,right,up,down arrows we must move our character in
that direction. As mentioned above, we are not really moving the character, but moving the map!
Notice that we are using the requestAnimationFrame function here. This is a more reliable function than setInterval/timeout functions
to do animations. This generally guarantees that the browser will call this to match the device refresh rate - roughly 60 times
per second.
moveCharacter() function
This function is called everytime our loop runs - roughly 60 times per second and will adjust the position of the map and
character elements based on what the user has entered.
We update the x and y coordinates by the setCharacterDirection function and then finally
adjust the map and character elements accordingly with the following statements:
map.style.transform = `translate3d( ${-x * pixelScale + camera_left}px, ${-y * pixelScale + camera_top}px, 0 )`;
character.style.transform = `translate3d( ${x * pixelScale}px, ${y * pixelScale}px, 0 )`;
The keydown and keyup event listeners
These two event listeners determine what key press the user is currently pressing on. The reason we have to use a array held_directions is
to keep a clean way to track which key is pressed. If we dont have this then there could be conflicts when the user presses more than
one key at a time. For example the the user can press both left and right key. Without the use of an array to effectively push and pop
they key presses, we can end up with janky animations.
What is this pixel scale variable?
Since our spritesheet and map are small pixelated images (eg 16x16 sheets), we need this variable to scale up. At the moment each
pixel is treated as 2. You can scale this up when the user is using a smaller device.
Final thoughts and future work
Phew! In this article I went through how to setup a basic Harvest Moon / top down type RPG with simple HTML, CSS and JavaScript.
We did not have to use JavaScript game libraries or mess around with the canvas.
The basic idea of doing this type of game is to have a camera, map in the background, and character element. The camera and character
stays fixed, and the map is the one that actually moves around to give the illusion that the character is moving around.
So this is my first attempt at creating a HTML game, but further improvements I can see are as follows:
- Having walls and objects on the map
- Creating NPCS for the character to interact with
- Adding menus and HUD type displays